A traditional flint and steel is ideal for practicing some bushcraft fire-lighting skills, and a lot of fun. However, it can be a bit tricky, so here are some flint and steel tips that might make it easier.
For folks who aren’t aware of the difference of some of the fire-lighting tools, go to the, – difference between flint & steel, ferro rod and magnesium fire starter, for more information.
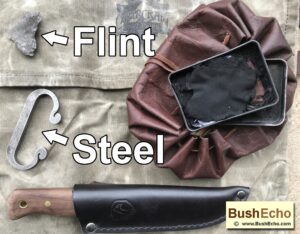
Before we get into the ideas and tips in the article, I use the term char cloth. But it could include charred material such as punkwood or tinder fungus. The term flint could also be interchangeable for chert, jasper, quartz, etc. In fact any rock that is hard enough to slice tiny particles off the steel striker.
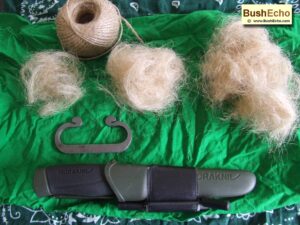
1. Increase your chances. The mini tower of char cloth.
Use bigger char cloth so there is more chance to catch a spark on the cloth.
If you haven’t got large pieces of char cloth, place two or three pieces on top of the flint.
Roughen up the exposed char cloth edge so the spark will take easier with more exposed surface area.
You can also improve your odds by folding over the cloth. Doubling over the cloth increases the vertical surface area. Which helps catch the sparks going up.
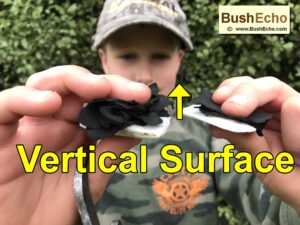
Above picture: For beginners, if you use two or three pieces of char cloth folded over, you have a mini tower. As long as the char cloth doesn’t get in the road of the striking steel, the vertical surface tower to the left has more chance of catching a spark.
Once you get more proficient at the flint and steel, you can go back to one piece of cloth.
If you drop the spark into charred natural material in the tin, place material on your char tin lid as well, to catch some stray sparks and increase your chances for a fire.
2. Leave the char cloth out for beginners.
Practice first trying to get regular sparks from the flint and steel. Leave the char cloth off the flint, until you are constantly getting sparks.
It can be hard for beginners to concentrate on holding the char cloth on top of the flint while striking it. So it is easier to leave it off and concentrate on sparks.
Try to get five out five sparks, that is five strikes and five sparks in a row. It could be three out of three. Or ten strikes and ten sparks in a row.
Once you have regular sparks, then use some charred material.
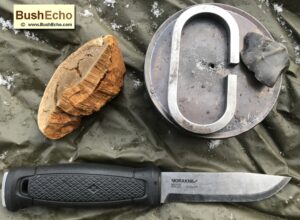
3. Use a sharp bit of flint.
This is a very important tip, if you haven’t got a sharp edge on the flint, (Or chert, agate, quartz, etc.) for it to slice tiny pieces of metal of the steel striker, it is hard to get a spark.
You can have great technique and a perfectly tempered steel striker, however a sharp flint edge is fundamental.
Knap the edges (Use safety glasses, etc.) for a fresh sharp edge. Or use another flake piece.
4. Turn it upside down.
When you use the edge of the flint, it can become dull quickly. So one tip is to turn the flint upside down and use the exact same edge, but a 180 degree flip. A lot of times it will be it be sharp enough and you can get some more sparks.
5. Try holding the flint at a different angle.
Some people prefer to hold the flint at a ninety degree angle. However if the flint has a very fine thin edge, striking it at that angle can dull the edge quickly and snap off pieces of the edge.

I prefer holding the flint with an angle up. Depending on the size of the flint and shape of the edge, experiment holding with a shallow angle to a very steep angle. (This is for striking down with the steel striker technique.)
For using the technique were you hold the steel stationary over the char tin and strike with the flint, the angle of the flint can also be experimented with as well.
6. Correct technique and speed.
If you strike the flint too hard, the flint will quickly get blunted. If you don’t strike with enough speed, or not enough pressure it is hard to get a spark.
You do not have to beat the crap out of the flint to get sparks, but controlled technique with just enough force.
Practice, practice and practice.
7. Swap hands.
If you are having trouble trying to get good technique, try swapping hands. See how the dominant hand feels trying to hold the flint, or vice versa.
Sometimes holding the flint in one hand and striking it with the other might feel more natural.
8. Try different techniques.
As well as trying different hands, you might prefer using a different technique.
Instead of normally holding char cloth on top of the flint, and using the steel to strike down, you might strike with the flint. Hold the steel striker stationary and strike with the flint downwards. For this technique you have the char tin underneath and strike the sparks down.
For three different techniques on how to use the flint and steel, visit – flint and steel troubleshooting.
9. Shortcuts don’t work well in the wet.
The colder and wetter it is as a rule, the harder it is to get a fire going. (Ironically when it is very hot and dry and you don’t need a fire going, it is easier to light it.)
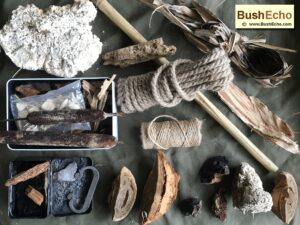
So for the cold, instead of making a small tinder bundle, (Also called a bird’s nest.) take a bit more time and make a bigger bundle.
Collect more twigs, kindling and fuel then normal for wet conditions.
Try to gather material that is off the damp ground. Such as standing dead wood, protected bark on the dry side of the tree, or dry pine needles caught in branches, etc.
Remember to lay some sticks or bark down as the base. This helps keep the damp ground away from the material and new fire.
For moist environments, try placing the charred material in a plastic snap lock bag so it doesn’t get damp.
Warm up tinder material in your clothing inside pockets, close to the body, but not directly on the skin.
If some material of the birds nest is subpar, use two or three pieces of char cloth to help ignite it. This will give it more time for the heat to transfer the ember into the birds nest and dry it out and help it catch on fire. Transfer the ember from one piece, by placing it on top of two other pieces of char cloth. Place this into the tinder bundle and oxygenate it by blowing into the bundle.
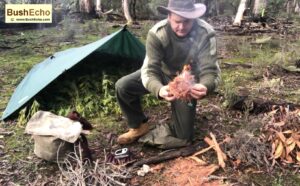
Above image: Fire-lighting in the snow. Flint and steel kit, bracket fungus and the Mora Garberg knife.
10. Make two or three layers for the tinder bundle.
Finely processing a whole tinder bundle can take a lot of time. So one way to save a bit of time, but still get a fire, is to construct the bundle into layers.
The layers might consist of:
1. Inner layer. The ember will be transferred directly to this material, so it should be like cotton wool. A lot of fine pieces, with a lot of surface area.
Ensure the material is dry. Shred, rip, rub and roll this section as fine as possible.
2. Middle layer. This is still finely processed, but it doesn’t have to be as fine as the inner layer.
3. Outer layer. The outer layer of the bundle can be courser. This section saves time preparing and also gives the fire a more robust fuel to latch on.
(Fine materials like dry thistle seeds, cattails seed fluff, might be mixed in with the inner layer. Sub-par material might be on the outer section.)
11. Test it first.
As the traditional flint and steel doesn’t produce very hot sparks, we ideally need a near perfect platform to catch the spark and help create an ember. Char cloth, charred punkwood, charred plant material and some bracket funguses (un-charred and charred) are ideal if prepared properly.
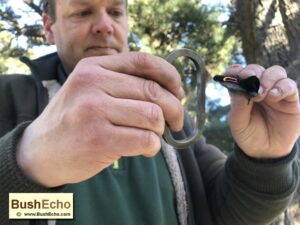
So to ensure it is charred correctly, test a piece with the flint and steel first before putting away the batch in your char tin. See how easily the material will catch a spark.
If it doesn’t take a spark easy, place it back on the fire and re-char it. The charred material should be black. If there is color left in the fabric or material, it may not be charred long enough.
If it is well and truly charred and doesn’t take a spark, recheck the cloth is 100 percent cotton, denim or linen. Or the natural material like punk wood is suitable.
Gun cleaning patches that are 100 per cent cotton work well. Some are a bit small, so you can use two pieces once charred.
12. Have a collection of rocks and flakes.
Chert, obsidian, flint, agate, jasper, and quartz are suitable for flint and steel fire-lighting.
However, not all rocks are equal, the rocks can vary greatly with their individual composition. Some might be mixed in with bits of dirt or other material, other rocks could be brittle and not hold an edge.

Because the individual rocks are very different, some are naturally better for fire-lighting. So it pays to be on the lookout and have a wide assortment of rocks.
If you are not 100 percent sure of what type / name of rock is this one or that. (Like me.) Or if it is suitable to use, test it with the steel striker and see if you can get sparks. If you haven’t the steel with you, throw the rock in your pack for later to test it.
Collecting a good supply of rocks will ensure you have some useable flakes for future fire-lighting. Good for backups when your favorite flint has been used up.
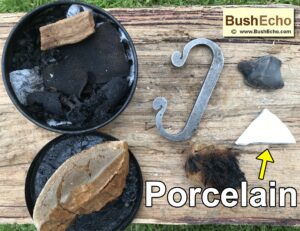
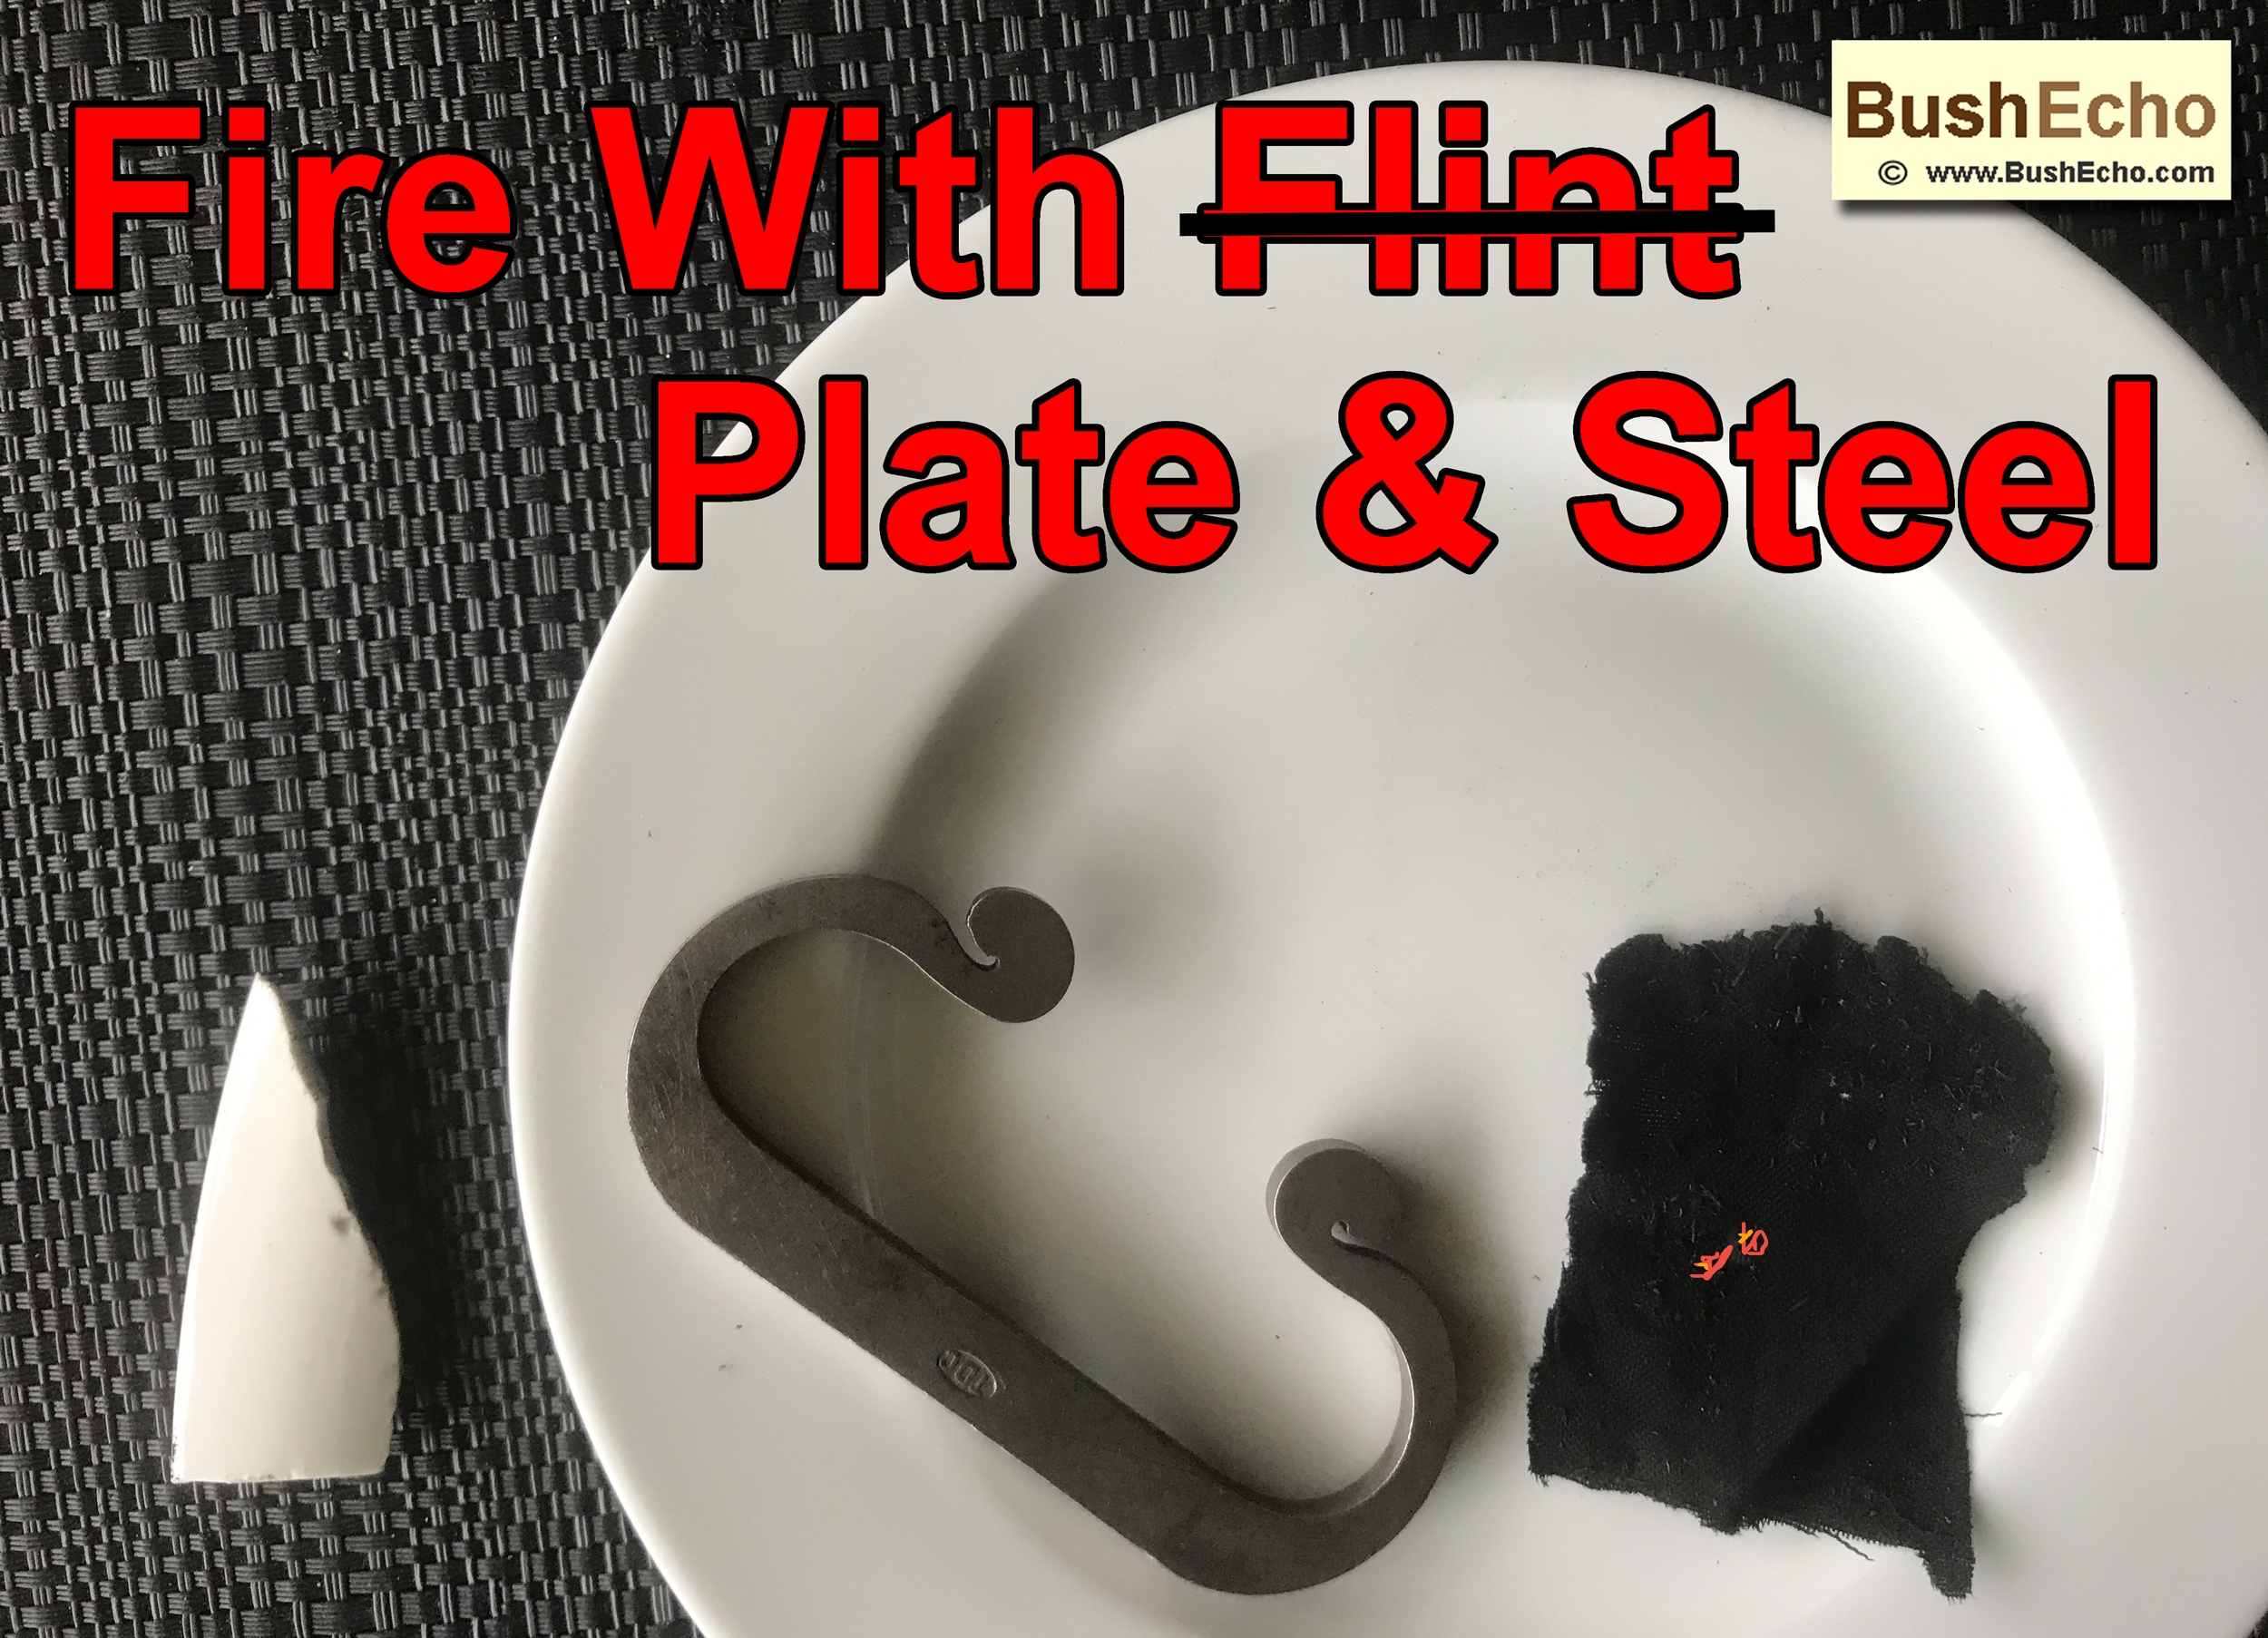
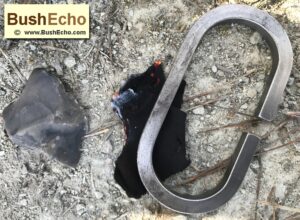
Above image: For something different, a broken bit of some porcelain plates can be used to get sparks from the steel striker. For more information visit – How To Start A Fire With A Plate And Steel
13. Don’t rush the process, relax and smile.
Collect and prepare your fire-lighting materials properly before you strike a spark. This allows you to take your time between steps.
If you have an ember on good char material, don’t rush the process. As it will smolder for a long time and there is no rush.
Frantically trying to transfer the ember into the tinder bundle can end up in a dropped ember on the damp ground.
Fire lighting can be frustrating, especially with friction fire and the flint and steel. So instead of cursing, smile and relax. Take your time, persevere, enjoy and appreciate the whole magical process from spark to flame.
14. Cheat.
Use cheats to help until you get the hang of using the flint and steel and get a fire going.
If you getting sparks and catching them in the char cloth easy enough, but are having trouble transferring the ember and heat to flame. Try using some jute twine for the tinder bundle. (Or mix it in with shredded barks and dry grasses, etc.)
This is also handy if there are no natural materials available. (Like in the back yard.)
Use around 6 feet (Roughly 182 cm.) of jute twine, depending on thickness for the inner layer of the tinder bundle. Cut it into smaller section, so it is easier to strip the pieces and finely shred it.
You can also use some cotton wool balls shredded into the tinder bundle for easier fire-lighting.
15. Improvise the camp fire for the char tin.
If you don’t have a camp-fire to put the char tin in, use a spirit stove, (Like a Trangia.) or gas stove for the heat.
Make it in a well ventilated area.
Don’t be like me and try to char the tin in the oven. It took a fair time for it to work in the oven and it stunk up the house. My wife wasn’t happy and it was cold going for the next few days.

Above picture: Trangia stove inside a Pathfinder Bottle stove for a wind break. This round char tin fits nicely inside it for charring material.
16. Char tin options.
If you haven’t got an Altoids tin or confectionery tin, use an old coffee or fruit tin. Puncture a hole in the tin lid with a nail.
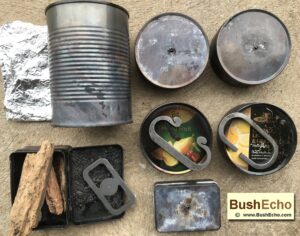
The tin doesn’t have to have a nail hole in it, but the gasses have to escape somehow. Like through the hinges on some tins, or a loose lid. (Danger – If the gasses heat up and can’t vent, the tin may explode.)
The hole is very handy though as you can see the gasses escape. When the gasses stop coming out of the hole, the cloth should be done or very close to finished.
You can also place items directly on the fire and char them without a tin. Bury the material in the ashes and coals. Or light the material on fire, charring it and stamp it out. Depending on the material, time, heat, it can be a bit of hit or miss.
Charred lamp wick and jute rope are also worth experimenting with. Partially char them with your lighter, then smother it out, without damaging the material.
17. Experiment.
Try different materials for tinder, tinder bundles and kindling. Try charring some natural dried plants, punk wood, dry seed heads and barks.
Tinder funguses are ideal to experiment with what works and what doesn’t catch a spark. Most will have to be charred first before they take a spark, but some types can catch a spark.
For your tinder bundle, mix a few different materials in the one bundle. As an example, cattails can burn quickly, so mix it with some different barks, crushed dry leaves, etc.
Summary – Flint and steel tips.
The traditional flint and steel can be a dependable and sustainable way of creating fire. But it does take a few tweaks, persistence and some preparation.
Take a bit more work and ensuring the materials are suitable and finely process.
Some of the flint and steel tips above will also help with other bushcraft and survival fire-lighting techniques as well. Such as a friction fire or ferro rod, not just the flint and steel.
Thank you for looking at this article, what are your flint and steel tips?
References and resources:
Essential Bushcraft, by Ray Mears.
The Art of Fire, by Daniel Hume (Also called – Fire Making: The Forgotten Art of Conjuring Flame with Spark, Tinder, and Skill.)
Art II. Making Fire with Flint & Steel. By J. Gottfred.
Art. XI. Tips for Fast Fires with Flint & Steel, by J. Gottfred.
The Survival Handbook. A Practical Guide To Woodcraft And Woodlore, by Ray Mears.
Affiliate Links – This article may contain some affiliate product and Amazon affiliate links. This comes at no additional cost to the reader, and helps to support the website. Thank you.
Copyright © by BushEcho. Content on this site cannot be copied and is protected by copyright law. Please contact the author/s for permission.
Disclaimer – This information is for educational purposes only. The author/s and website disclaim liability for any damage, mishap, or injury that may occur from engaging in any activities or ideas from this site.